
The Bridal Beauty Prep Guide.
Thank you so much for joining me in this bridal beauty roadmap 🗺
My goal is to provide guidance drawn from my experience working with clients, combined with my industry expertise (over 20 years), so you can feel confident and prepared for your big day.
The items in this guide are options, opportunities, and ideas to create a feeling of yummy self-care and to partake in some good ol’ fashion beauty fun. I am here to help you create the perfect wedding look that makes you feel amazing.
Because that’s what it’s all about!
Sending so much bridal love,
xx
Colleen

READY TO PREP
READY TO PREP
TABLE OF CONTENTS
(clickable)
Module 8 - Don’t Forgets (tips for the night before and the morning of)
BONUSES (found in welcome packet)
Bonus 1 - Day of Emergency Kit Checklist
Bonus 2 - Beauty Treatment Timeline - Cheatsheet
Bonus 3 - Rehearsal Dinner Hair and Makeup - Example Look
Bonus 4 - Favourite Products List
Copyright Notice (please read)

The Bridal Beauty Prep Guide
First Steps.
(It is likely you are in this program because we are already set to work together for your special day, or maybe you have already found your perfect artist. Feel free to disregard the sections in this module that pertain to finding an artist. However, there are still many tidbits inside this chapter that are relevant to your first steps.)
HOW TO FIND YOUR PERFECT ARTIST
There isn’t any denying, vendors book out FAST. So, if you’re up for it, start your search for your favourite vendors early in the game. Reach out to a few you love and start a conversation. You will find very quickly which one you jive with the best. When one stands out to you, I suggest you scoop them up if they are currently taking bookings for your projected date. I’ve even had brides be in touch without knowing what date their wedding was actually set for, and we worked together as more information came up.
Things to ask your Makeup Artist before booking:
Are there any Travel Fees?
Do you work with assistants?
Where are you located?
When do you suggest we do the consultation (if applicable)?
Where would we do the consultation (are you mobile or out of studio)?
What do I need to do to secure the date?
What percentage is the deposit?
How do you accept payments (credit-card, PayPal, cheque, etc)?
What are your protocols for COVID-19?
Once secured, your artist will be the best one to go over specific hair and makeup styles that are most suited for your face shape, eye shape, skin tone and type, as well as the colour, texture, and density of your hair.
HAIR AND MAKEUP CONSULTATION
(Things to go over during your trial)
The hair and makeup consultation is typically meant to be a time where you and your artist can meet, go over your desired look for the wedding, and do a full test run of the hair and makeup. Trials can be done at any time, yet I find them to be slightly more effective to execute closer to the wedding date. This is because you will have your time to go through different inspiration images, and the closer to the date, the more sure you will be about what you are after. I find the trial date ‘sweet spot’ to be about 1 - 3 months prior to the wedding date.
How to prepare for your consultation
Send a few inspiration images you have found online in advance to your artist so he/she has an idea of what your vision is before meeting for the consultation
Send a photo of you in your dress, as well as a closer selfie, so the artist can get a sense of your skin tone, hair colour/texture, and your overall style when it comes to your gown
Ask if the artist would like freshly washed/dried hair, or if you should wash the day before (I usually recommend hair washed the night before, and have it fully dry before the appointment)
If you have any products that you love, feel free to bring, or share what they are with your artist
Note any allergies or sensitivities you may have
Will you be wearing a veil? If so, have that on hand to show your artist. If you don’t have it on hand, you can show a picture of you wearing it, or a product photo of it (or something similar) online
Check in with your artist about what they provide for touch ups on your wedding day. Will they be leaving you with a touch up bag? If you try a lipstick with your artist at the consultation, it may be wise to get the brand name and shade if you prefer to have the full product with you on the day.
Some brides like to coordinate the consultation with an event such as the bridal shower, engagement photos, or a night out. This is great! However, the look designed for those events will likely be different than the one for your wedding day. It could be a good option to do this first appointment for your particular event, but potentially book in for an additional consultation closer to the wedding date, should you want to see the exact look.
TIP: You can also start planting the seeds with your bridal party/family members as to what services they would like, and what styles they are interested in (Note - having a photo with them on the day is ideal!).
MINDSET EXERCISE
At the beginning stages of planning your wedding, as well as whenever things get a little hectic, it can be really beneficial to do a little reset and tune into what you want your wedding experience to look like. Create a cozy and safe space, grab a journal, and ask yourself the following items:
Try to envision yourself in the setting and notice what comes to mind:
How do I want to feel on my wedding morning?
Who do I want there with me?
What do I want the vibe to be like?
What things are surrounding me? Food, music, scents, etc.
What is the most important to me for my wedding experience?
The Bridal Beauty Prep Guide
Skincare.
BASIC SELF CARE FOR YOUR SKIN
The items below can be started at any point (the sooner the better).
Implement a gentle home body scrub once a week
Gently exfoliate your face once every two weeks
Moisturize daily, morning and night
Try sheet masks once every two weeks (not only for your face, but try your feet and hands as well!)
Hydrate! Stay on top of your water intake game
Consider vitamins that help with skin health such as a multivitamin, biotin, and collagen.
Ingredient Glossary:
Alpha Hydroxy Acids (AHA’s): Water soluble acids made from fruit, which exfoliate the skin. Good for evening skin tone and smoothing. Common AHA: Glycolic acid.
Amino Acids: The proteins that naturally make up collagen and elastin which gives skin its shape. Products with this ingredient can help the skin get back to a more firm appearance.
Beta Hydroxy Acids (BHA’s): oil soluable acids that target oil secretion. Great for those with acne prone skin and those with redness and inflammation. Common BHA: Salicylic Acid.
Biotin: B-Complex Vitamin that aids in metabolic balancing and gut health which in turn, promotes healthy hair, nails, and skin.
Collagen: Plays a huge role in our skin health. The body’s natural level of collagen depletes as we age. Taking collagen supplements can improve skin elasticity, creating a more even and firmer texture to the skin.
Guarana: Ingredient used to help combat cellulite. It is packed with caffeine which increases blood flow.
Hyaluronic Acid: Found naturally in the skin, this sugar molecure increases the skin’s moisture content while also preventing water loss.
Vitamin E: A vitamin that is best known for diffusing any scars or pigmentation on the skin.
HOME DIY TRICKS
Sugar body scrub - Great as a body exfoliator. Mix a small amount of honey (alternatively coconut oil) with brown sugar and a touch of warm water. Use gently in circular motions over skin. Can also be used on a soft bristled toothbrush for a lip scrub.
Coconut, Jojoba, or Grapseed oil - for keeping cuticles moisturized.
Tea Tree oil spray - mix a few drops into a small spritzer bottle and dilute with water. Use as an anti-inflammatory spray.
Castor oil - apply for healthy maintenance/growth of lashes, brows and hair.
POPULAR SPA GRADE TREATMENTS
Facials: A relaxing spa treatment focused on cleaning and hydrating the skin. There are a lot of various versions out there, and they can be suited specifically for your skin type and needs.
Approximate longevity: 1 week / Approximate cost (CAD): $150-$200
Waxing: This is a long standing way to do hair removal. A technician will lay wax on desired area and pull when hardened to remove the hair.
Approximate longevity: 3-4 weeks / Approximate cost (CAD): $15-$80 depending on area
Body Scrubs: This is a treatment that is great for detoxing and exfoliating the body. It can be done with varius formulas, such as coffee, sugar, ground pumice, clay, and himilayan salt. Some of the benefits of this treatment include: increased blood flow, detoxification, evens complextion, and it also aids in the absorbtion of lotions and the appearance of self tanner as the dead skin cells are removed in the process.
Approximate longevity: 1-2 weeks / Approximate cost (CAD): $150 depending on area
Body Wraps: Similar to the scrubs this is a body treatment that aids in detoxifying. It can be in the form of plant such as body butter leaves or seaweed, and sometimes clay. This is a treatment that is great for detoxing and hydrating the body. This treatment can help with temporary de-bloating and water weight loss.
Approximate longevity: 1 week / Approximate cost (CAD): $150 depending on area
POPULAR MEDICAL GRADE TREATMENTS
Microdermabrasion: For this treatment, a technician will use a tool (usually a diamond tip) that exfoliates and buffs away the outer layer of the skin, and sucks it out at the same time. It can improve sun damage, fine lines, age spots, acne scarring, melanoma, and overall skin texture. It is one of the best exfoliating treatments and a great option for before your wedding day.
Dermalinfusion is a variation of microdermabrasion, where serum is immediately applied to the skins surface while it is being suctioned.
Approximate longevity: 4-6 weeks / Approximate cost (CAD): $150
Dermaplaning: This is a type of resurfacing for your skin. It is done by using a scalpel to gently exfoliate the top layer of skin as well as rid it of any peach fuzz. You are left with a super smooth and fresh appearance. Tip: this treatment should be avoided by those with extremely sensitive skin and/or rosacea.
Approximate longevity: 3-4 weeks / Approximate cost (CAD): $150-$250
Botox: Also known as ‘neuromodulators’ that ‘freeze’ the small muscles in your face which alleviates lines and wrinkles. Botox is a brand and one of the more common and reputable ones. After about 5-10 days post treatment you will see results that last up to 4-6 months.
Approximate longevity: 4-6 months / Approximate cost (CAD): $10 per unit (typically 20+ units are used depending on area)
Dermal Fillers: Fillers are a way to restore fullness in the face where we tend to lose volume as we get older. They can be injected into different areas, most commonly used in the cheeks and lips. They can also be used to adjust the shape of the nose and jawline.
Approximate longevity: Up to 3 years / Approximate cost (CAD): $550-$750 per vial (typically 1-3 vials)
Light Therapy: A great treatment for those with acne-prone skin. The use of two different lights are used on the skin; Blue LED light to fight any bacteria on the skin, and red LED to reduce inflammation. This treatment helps to produce collagen and give a plump look to the skin. Recommended to have approximately 10 sessions, spacing them out by 1 week at a time.
Approximate longevity: needs to be maintained every few months / Approximate cost (CAD): $40-$100
Laser Hair Removal: This is a type of hair removal that is much more permanent when the full sessions are complete. A technician will use a laser machine to ‘zap’ the hair follicles, removing the ability to regrow. Six to Eight treatment sessions are typically needed for each area.
Approximate longevity: appointments are done 8 weeks apart / Approximate cost (CAD): $250 per area
WHAT TO DO IF YOUR SKIN ACTS UP
When skin irritations arise, you can consult a dermatologist or physician that will help with diagnosis. Common places to be curious about are: diet (dairy and gluten are linked to skin disruptions), and sensitivity to a specific cosmetic ingredient (think new laundry detergent, new facial products, etc) and also stress (which can unfortunately be a big jerk when it comes to our skin). Try some calming techniques and consider minimizing your skin care routine temporarily, in case there is something that is irritating it. Keep track of what you are eating and products you are using, along with any skin flare ups. Whatever you do, do not pick or scratch your skin. Try your best to avoid touching your face, bacteria lives on our hands and it can transfer easily to our skin.
If you have increasing concern about any reactions your skin may be having, consult a dermatologist. It may be beneficial to have a skin patch test done to decipher if there are any specific cosmetic ingredients that may be causing flare ups. Read more about that here.
Also, remember to wash your sheets (especially pillowcases) once a week in hot water to rid them of any bacteria that may cause skin to react.
Keeping your makeup brushes clean is also a huge factor in keeping bacteria away from our face. Two of my favorite cleaners are Dr. Bronner’s (for a deep clean) and Cinema Secrets (for the quick clean)
TANNING
There are a few different options you can choose from when it comes to tanning for your wedding day. I know some people still swear by a little old fashioned tanning bed time, however, I am here to say (shout) that there are other equally as effective ways to get that gorgeous glow without putting your skin under harmful lights.
Self tanning at home
Choose between mousse, gel, lotion, or sprays that help you achieve beautiful colour in the comfort of your own home. Check out my tanning guide to get the full run down on how to apply yourself. Test this out a few times before the day of your wedding to really get the hang of it.
Spray tans
Spray tanning is typically done at a salon/spa environment where you have a technician using an airbrush gun to apply self tanner to your body/face. This can be a good option, but I usually find it a little dicey when it comes to your wedding day. I’ve seen many incidents first hand of clients that went for a spray tan a few days before the wedding and came out with inconsistent application and tonal problems! (for example one bride, who had gone to the same place to get the same service with the same technician STILL had an incident - 3 days before the wedding - where the tan came out GREEN! She had spent the next two days scrubbing the tan off as much as she could). Can you imagine??
TEETH (NOT SKIN, BUT STILL IMPORTANT!)
• Try Crest Whitestrips at home to get to your desired shade, and maintain it with more spread out sessions until your wedding day. Approximate cost: $50-$100
• You can also go to your dentist and request a whitening treatment there. You will see results immediately, as opposed to over time with the Whitestrips. Approximate cost: $400+
SKIN CARE PRODUCT GUIDE
I’ve put together a reference guide for some of the best products categorized into different uses/skin concerns.
Products are clickable within the PDF. Hit the button below to download.
The Bridal Beauty Prep Guide
Nail Care.
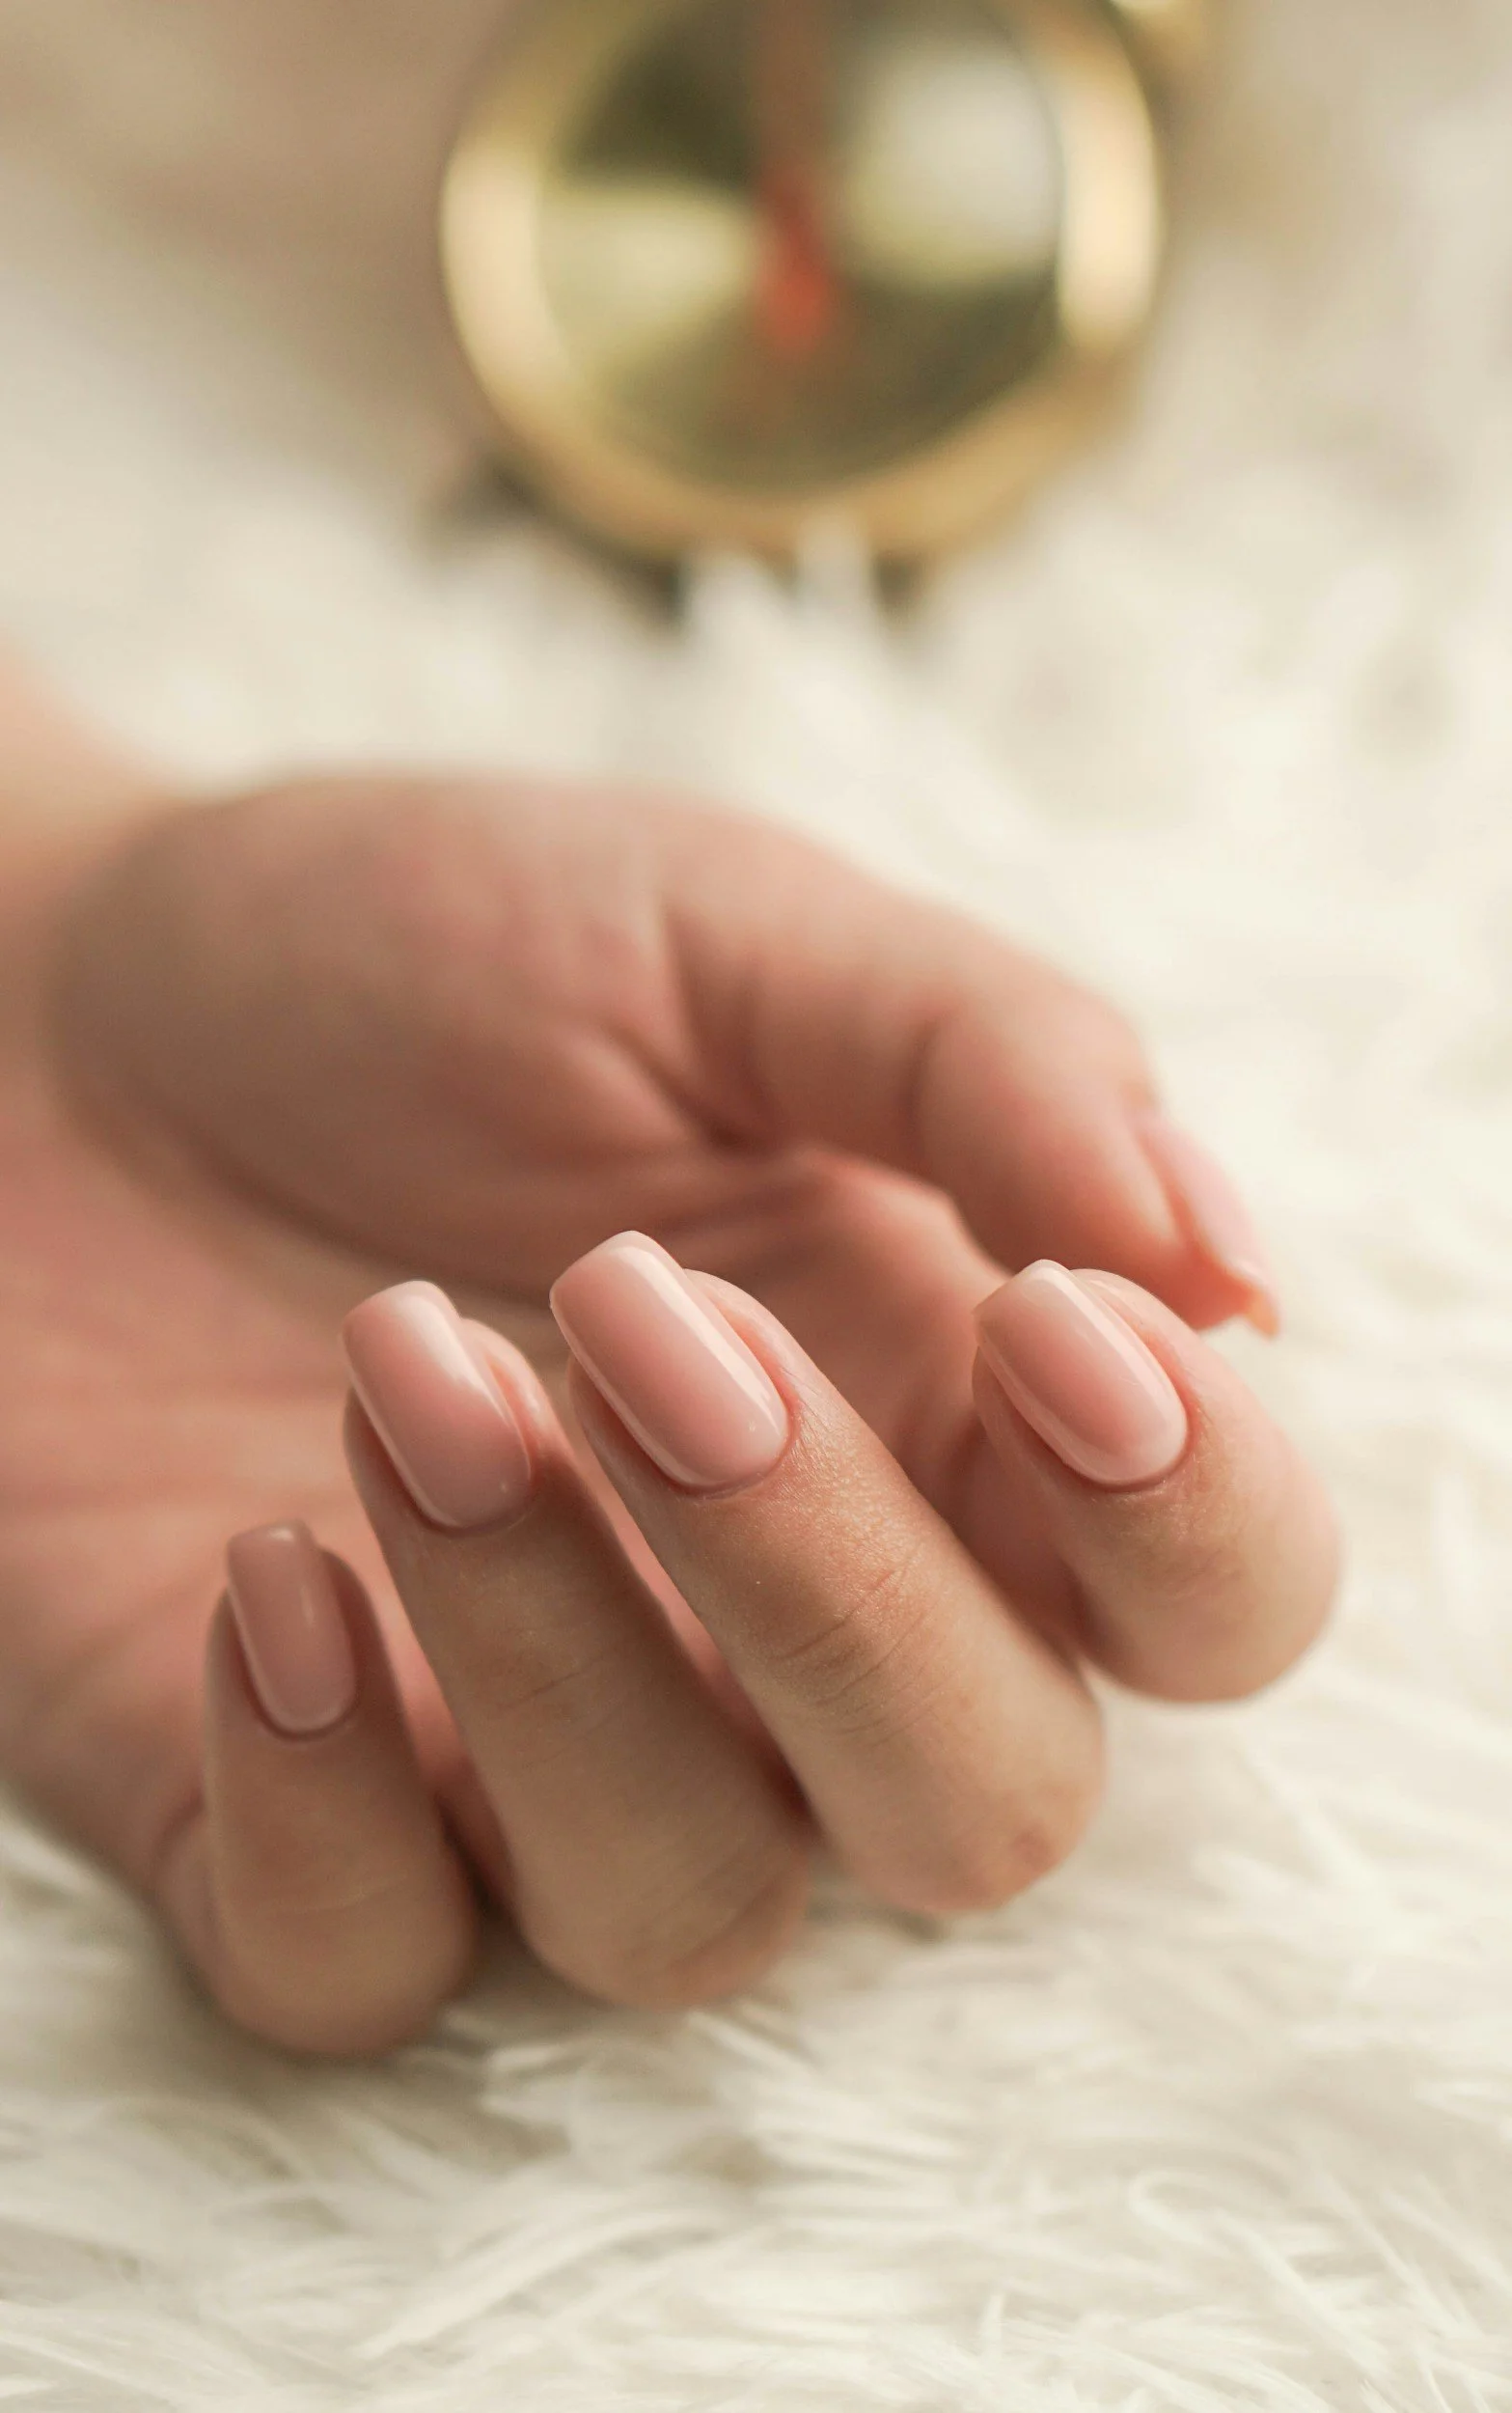
USING YOUR NATURAL NAILS
Keeping your nails au natural can be a very beautiful look for the day of. This is especially nice if you don’t like the feel of something added, or something you may have to have removed after the wedding day.
Tips to keeping your natural nails healthy and groomed for the wedding day:
Start using a cuticle oil nightly to promote cuticle health and prevent any drying and cracking
Have a nail file handy in case you have any small chips or nicks so you can smooth them out before they snag or break any more
Vitamins: Biotin and Collagen both promote healthy, strong nails
Use a nail strengthener such as OPI Nail Envy that encourages thicker, stronger nails
Don’t forget to moisturize your hands! Use a product specific for the hands, and apply often (daily). Even when using any facial moisturizer, you can rub whatever is left on your fingertips over the backs of your hands for extra moisture
Treat yourself to a relaxing manicure at a spa - usually recommended 1-3 days before the wedding
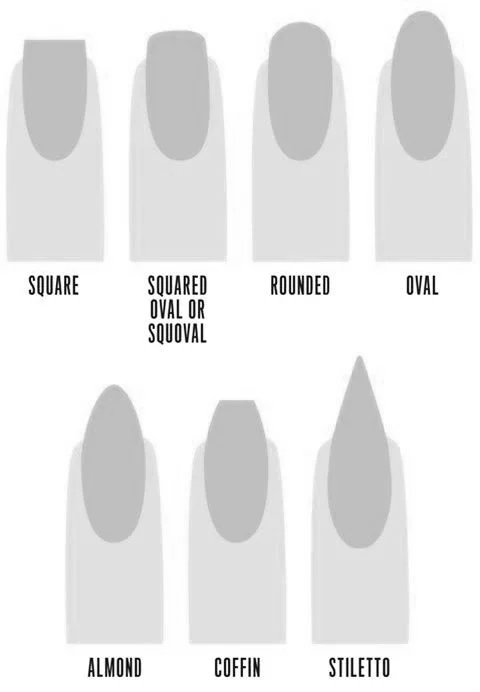
NAIL SHAPES
NAIL ENHANCEMENTS
Sometimes you want a little extra something when it comes to your nails. Between holding flowers, wearing the ring, signing the wedding papers, there is no denying that your hands are going to get a lot of stage time during the event. Below are some of the different styles/treatments you can get to elevate your nail game:
Acrylic Nails: This is the most durable of the false nail options. It is a powder formula dipped into a liquid transformer, and then applied by brush to your nail. It can be built on a nail tip to add additional length, and the product can be thick to make it nice and strong. These are good for those that would like to create specific shape to their nails. This style needs to have the nail “filled” once growth appears.
Approximate longevity: 3 weeks / Approximate cost (CAD): Full set $100, Fill $75
Gel Extension Nails: This style of false nail is similar to acrylics in the sense that it can be applied over a ti to create length and shape. It is done in three steps, a base coat, polish coat, and then a top coat, all cured individually under a UV or LED lamp. The product is thicker than shellac and creates a high gloss finish. This style needs to have the nail “filled” once growth appears.
Approximate longevity: 2-3 weeks / Approximate cost (CAD): Full set $100, Fill $75
Gel Polish: A hybrid option of nail polish and gel nails. It is a formula that is applied like a regular polish but needs to be cured under a UV/LED lamp with each step. This form of enhancement will not add length or shape. When growth appears, the full gel polish is removed and another round can be applied afterwards.
Approximate longevity: Up to 2 weeks / Approximate cost (CAD): $45
Dip Powder Nails: This type of nail does not require an led light, but still has great longevity. The process starts with a base coat, and then you ‘dip’ your nail into a powder substance that then becomes your nail colour. The nail is then buffed and sealed with a top coat. Due to sanitary safety, I would be careful with this form of nail, as it is likely the powder is being used for multiple people. You could look into if the salon separats a bit of the powder for each person, as opposed to keeping it in a alrge tub.
Approximate longevity: Up to 3 weeks / Approximate cost (CAD): $50
Nail Art/Nail Bling: These are different patterns, or jewels that can be added to your nails. Designs can be things such as an accent nail (one nail that is different from the rest) with shimmer or glitter polish. Some people add jewels onto some of their nails. Or you can add a design, such as a painted heart.
Approximate cost (CAD): $10 per nail
Pedicures: A great way to get your toes and feet in tip top shape. You can do this about a week before the wedding day. You can also request gel polish for your toes, which will make the colour last much longer!
Approximate longevity: 2-4 weeks / Approximate cost (CAD): $50-60
The Bridal Beauty Prep Guide
Hair Care.
OVERALL HAIR HEALTH
Keeping your locks healthy and happy leading up to the day can lend a hand with your styling. You artist should have on hand various products to provide extra grit and texture, but to have healthy and shiny hair as a base is great. Here are a few of my top tips to help with hair growth and health leading up to your wedding.
Massages: Scalp massages work wonders for stimulating the growth at the hair follicle. Try giving yourself a scalp massage once a day (in the evening) for seven days in a row, one round a month (Google hair inversion method for more info).
Weekly hair masks: Treat yourself to doing a hair mask at home once a week. These treatments are typically done on damp hair and left in for 10 - 20 minutes.
Silk Scrunchies/Bobbles: Gone are the days of regular elastics. Choose something that has a smoother texture to prevent snagging and breakage of the hair
Silk Pillowcases: Hair health doesn’t stop with silk scrunchies, but extends even further to silk pillowcases. Think about it, you spend around 8 hours every night laying on this piece of fabric. Silk has a smoother surface leading to less breakage and odd kinking of the hair (also amazing for reducing “pillow cheek” aka creases on your face when you wake up! And in turn has an awesome benefit of preventing fine lines).
HAIR CUTTING AND COLOURING
Your custom day of artist and/or hairdresser are going to be amazing to refer to. They can work closely with you to find the best colour and cut specifically to compliment your look. I advise to have the consultation with your regular hairdresser done approximately 6 months before the wedding date to see what your goal may be for the cut and colour. For regular maintenance on your usual colour, fresh is great, but it looks even fresher having a bit of time to settle in and have a slight regrowth. Having your last colour appointment 1-2 weeks before the wedding date is a good general timeline.
HAIR EXTENSIONS
One of my ALL time FAVOURITE elements of the bridal look. Hair extensions can lend a beautiful hand at creating the hairstyle of your dreams. There are many different ways to accomplish extensions. Below are some of the top options.
Long Wearing Extensions (Last 4-6 months)
Hand Tied: Your natural hair is ‘beaded’ and then the extensions are hand tied to your natural hair. Pros: currently the least damaging form of hair extensions using no glues, tape, or heat. Cons: Beads have a chance of slipping down/out. Approximate cost: $600+
Woven: Your hair is braided into a cornrow horizontally on your head and the extension hair is woven into the cornrow with a thread and needle. Pro: snug fit, great for thick hair / Con: harder to hide, can feel heavy and tight. Approximate cost: $300+
Tape in: Your natural hair is sandwiched in between the two layers of pre taped extension hair. They last around 6-12 weeks. Pro: quickest form of putting in extensions and can easily be maintained. Con: most easy detectable, and hard to flip if you are putting your hair up. Approximate cost: $400+
Fusion: The extensions are fused to very small sections of the hair using different glues and adhesives. Pro: the most discreet style of hair extensions, easy to move around / Con: damaging to your hair due to the chemicals, etc. Approximate cost: $800+
MicroBead: Applied by looping the extensions around your hair and clamped down with pliers. Pro: easy to move hair around / Con: the most damaging form of extensions as the metal clamp can cause breakage. Approximate cost: $400+
The most common and easiest form of long wearing extensions I most often work with are the Fusion extensions. Because they are adhered in such small portions, the hair truly mimics the natural flow, making it very easy to conform to any hairstyle.
Other popular ways to add length and/or volume to your bridal hairstyle:
Clip In Extensions (Day only)
These are amazing for using on the day of your wedding. Because we can place them exactly where we need to in order to create the most customized setting for your bridal hairstyle. For example, if you are doing a long braid to one side, we can adjust the placement so most of the hair is sitting to that side.
Hair Padding (Day only)
These are pieces of faux hair, foam, or tulle padding that are made to be applied for specific styles. For example, if you wanted a very large bun, you can insert hair padding made especially for a bun and create the shape needed. These are great temporary fixes for creating extra volume.
HAIR ACCESSORIES
Much like bling and art for your nails, you can use bling, flowers, or other decorative pieces in your hair, which creates a great overall vibe to the look you are going for. Below are some popular options:
Florals: Work in collaboration with your florist and artist to create a special floral design for your hair. You can do a floral crown, floral comb, or individually wrapped stems. I find having a large selection of individually wrapped stems to be the most versatile, as we can then really custom the design together on the day to how you are feeling and how it would sit best in the hair.
Vines: These are beautiful and delicate pieces of hair jewellery. They are often longer and typically wrap around the halo, however, I have also applied vines around buns, or winding up the side of a hairstyle.
Combs: combs are great to tuck into a bun, or to pull one side of your hair back up by your ear. They tend to be a bit on the bulkier side, and they will still need to be pinned.
Headbands: A modern take on a tiara, headbands can give you that extra little something added to your bridal hairstyle.
Birdcage veils: If you decided to opt out of a traditional veil, but still wanted a touch of the look, you could try out a birdcage veil. Usually it is in the form of a headband with sheer fabric that comes up and over the top of your head towards your forehead.
Tip: If you have darker hair, layering an accessory into the style will help your colour stand out more and add amazing texture that may be less visible without.
Some of my favorite designers for hair accessories:
I’ve also had many clients have amazing luck finding good quality, yet affordable hair pieces on Etsy and Amazon.
TIP: When choosing your hairstyle, also keep in mind what side of the alter you will be standing on during your ceremony. If it matters to you to have that side showcase something specifically, you can make sure to discuss this with your artist.
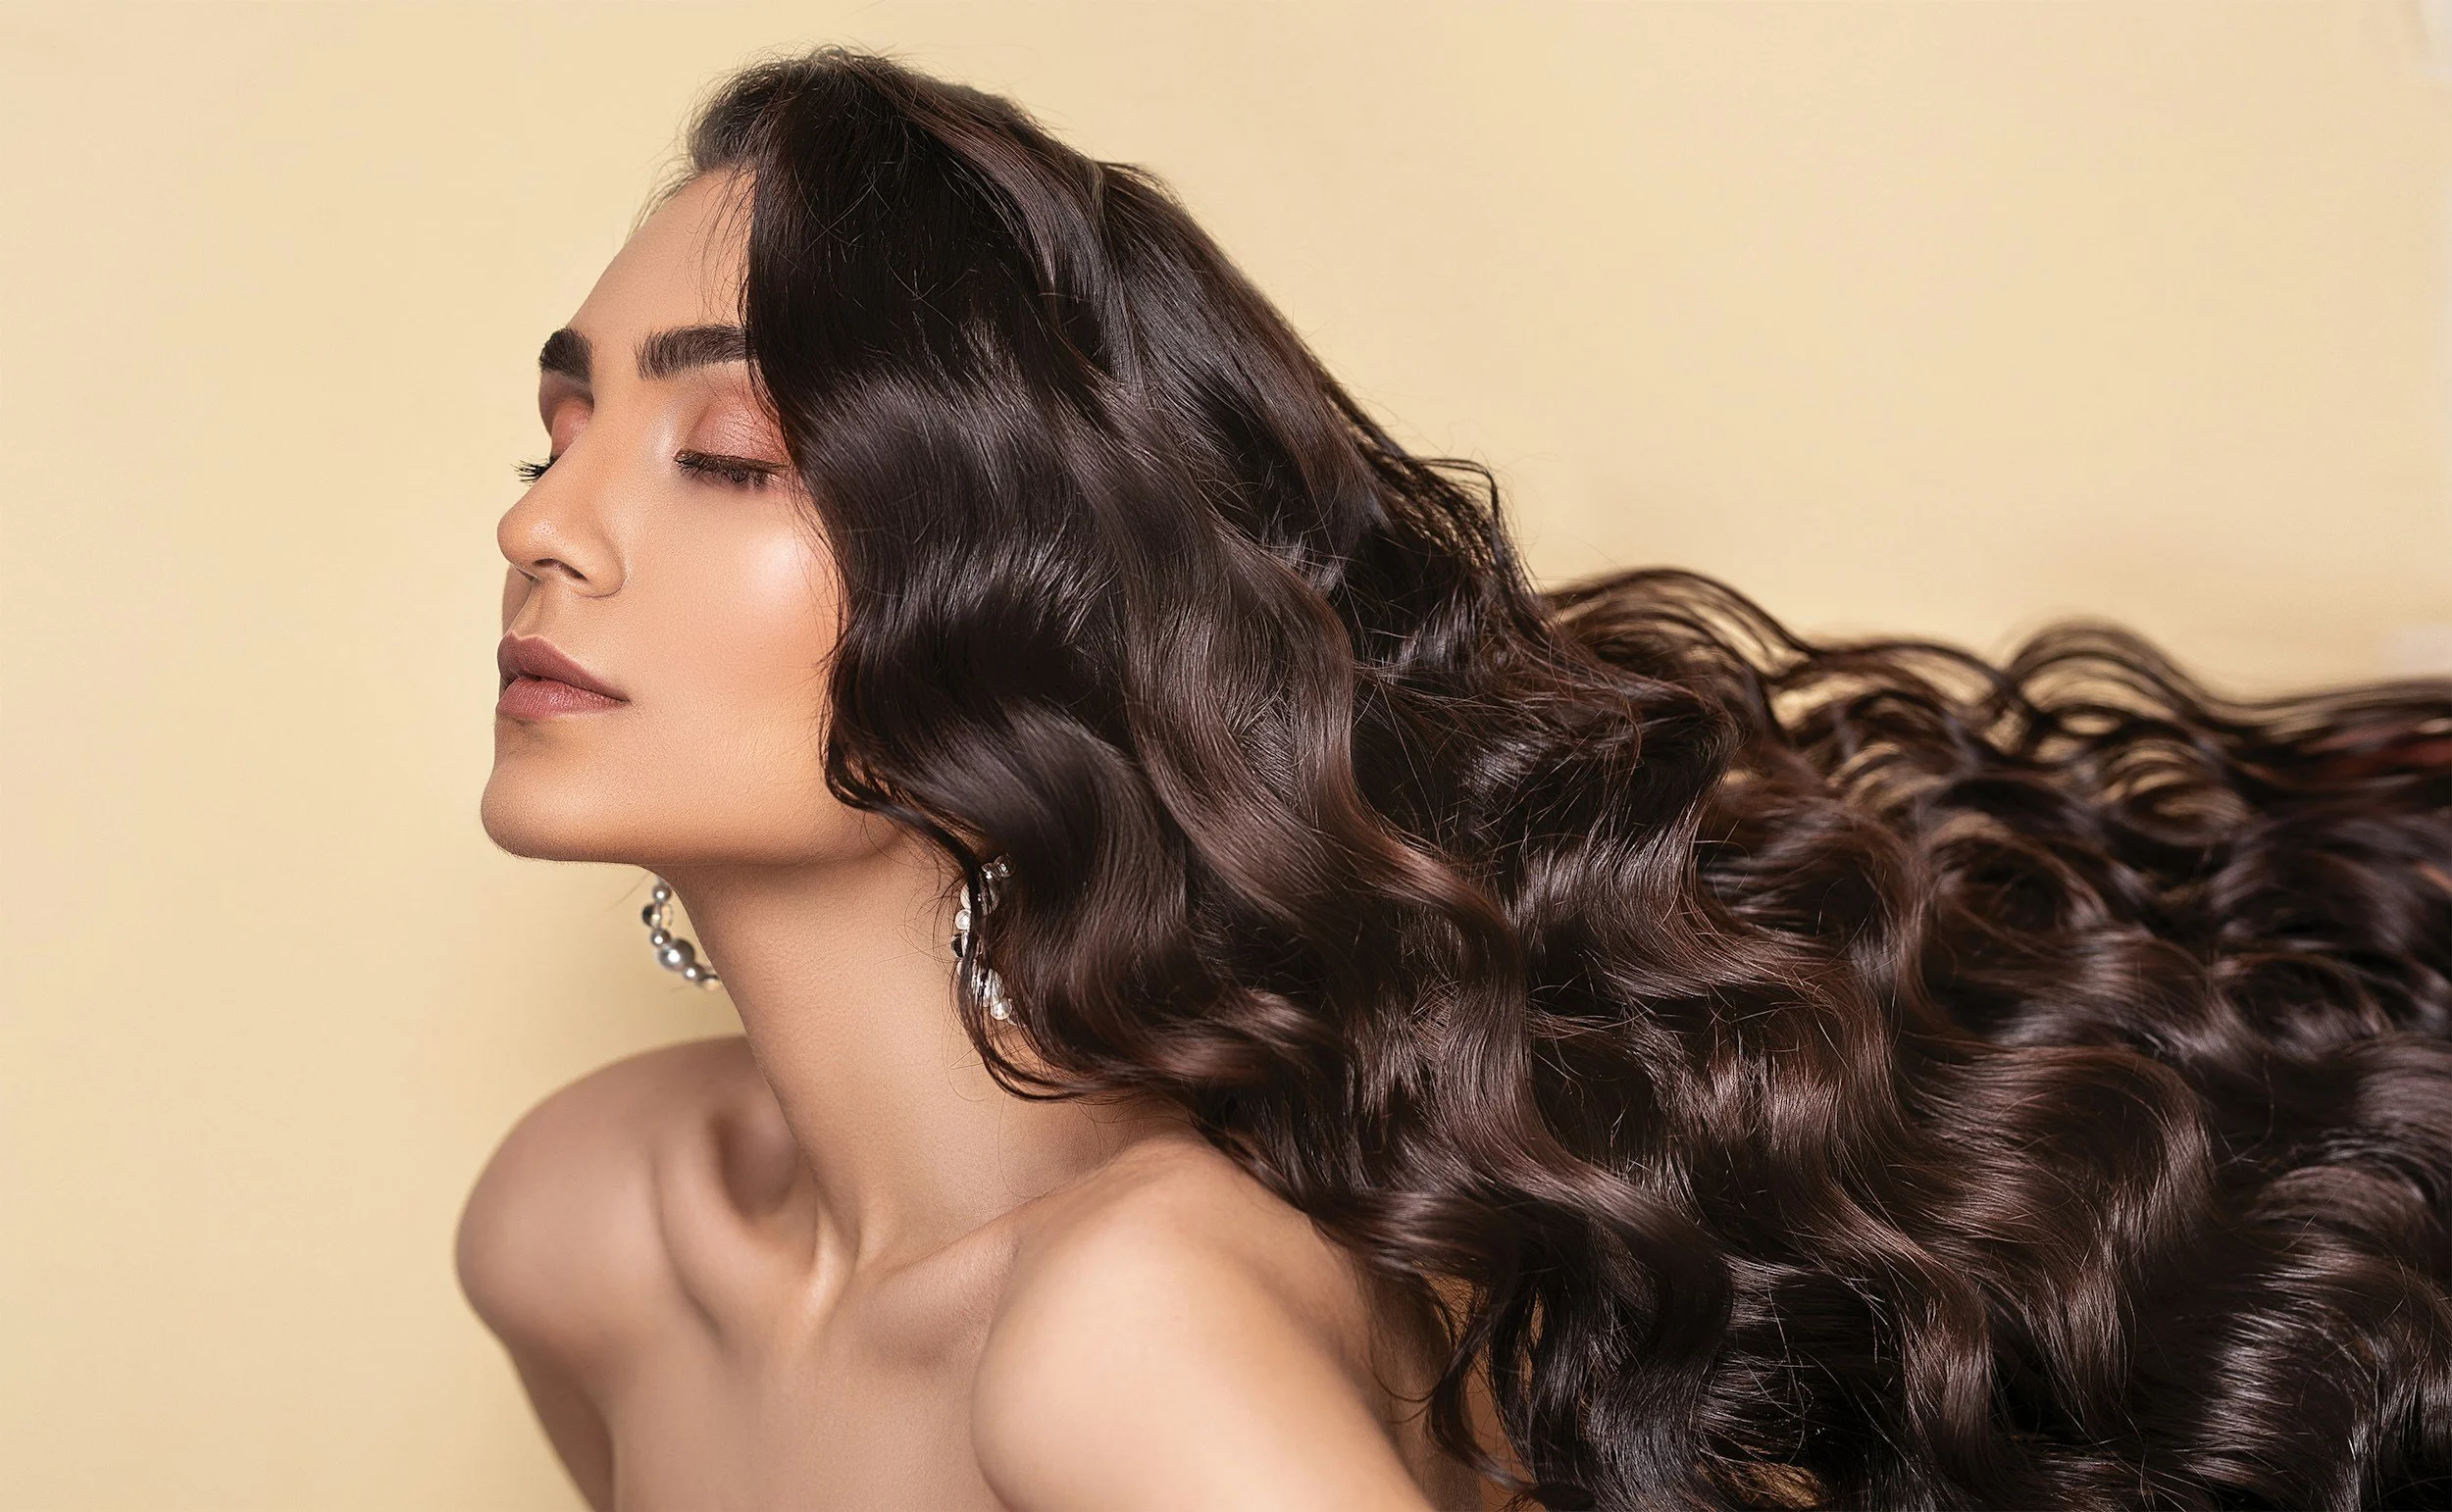
SAMPLE HAIRSTYLES
As mentioned previously, your booked hairstylist will be able to work one on one with you to determine the best style that suits your desired look with your specific length and texture. Below are a few examples from my past clients of some of the popular styles, showcasing with and without hair accessories.
PUTTING THE VEIL IN
Check in with your artist and see if they will be putting in the veil for you on the day of. It is highly recommended that the veil be pinned and secured from both sides. If you end up putting in the veil yourself, enlist a friend or family member to be in charge of it. Do a test run of securing it with pins so there are no hang ups on the day of.
Steps for putting the veil in:
1) Decide on placement. This is usually done snug into where the hairstyle is pinned, ex- above a low bun, or just below a half pinned style.
2) Align the curve of the comb to match the curve of the head.
3) *Wiggle* the comb into the hair as to not pull at the hairstyle.
4) Secure the comb with two pins on each side, done in an X shape.
To remove the veil:
1) Take the pins out from the X shape on each side, one by one.
2) *Wiggle* the comb up and out of the hair. This slight back-and-forth motion will be the least disruptive to the hairstyle, helping it remain intact.
HAIR CARE PRODUCT GUIDE
By clicking the button below, you will find some of my favourite products to recommend for hair care. All products are clickable within the PDF.
The Bridal Beauty Prep Guide
Lashes & Brows.
USING YOUR NATURAL LASHES
There are some amazing ways to enhance your own natural lashes without the assistance of the more permanent lash extensions. Below you will find some of the top options:
Lash Serum
A liquid conditioner used once a day (typically morning) that you apply directly along the lash line
You will see results in the length and density of your lashes as soon as 1 month, but fully within 3 months.
Approximate cost (CAD): $70 (for a tube that can last up to 6-8 months)
Lash Lift
Think of this as a ‘perm’ for your lashes. The technician will set your lashes up onto a pad that sits on your eyelid, then a perm solution is applied to the lashes that will create a beautiful, natural curl to the lash
Lasts approximately 6-8 weeks
Approximate cost (CAD): $40
Lash Tint
a technician will set your lashes onto a pad on your eyelid and apply a dye to the lashes
Lasts approximately 4-6 weeks
Approximate cost (CAD): $25
TIP: A lash lift and a lash tint are incredible when done together!
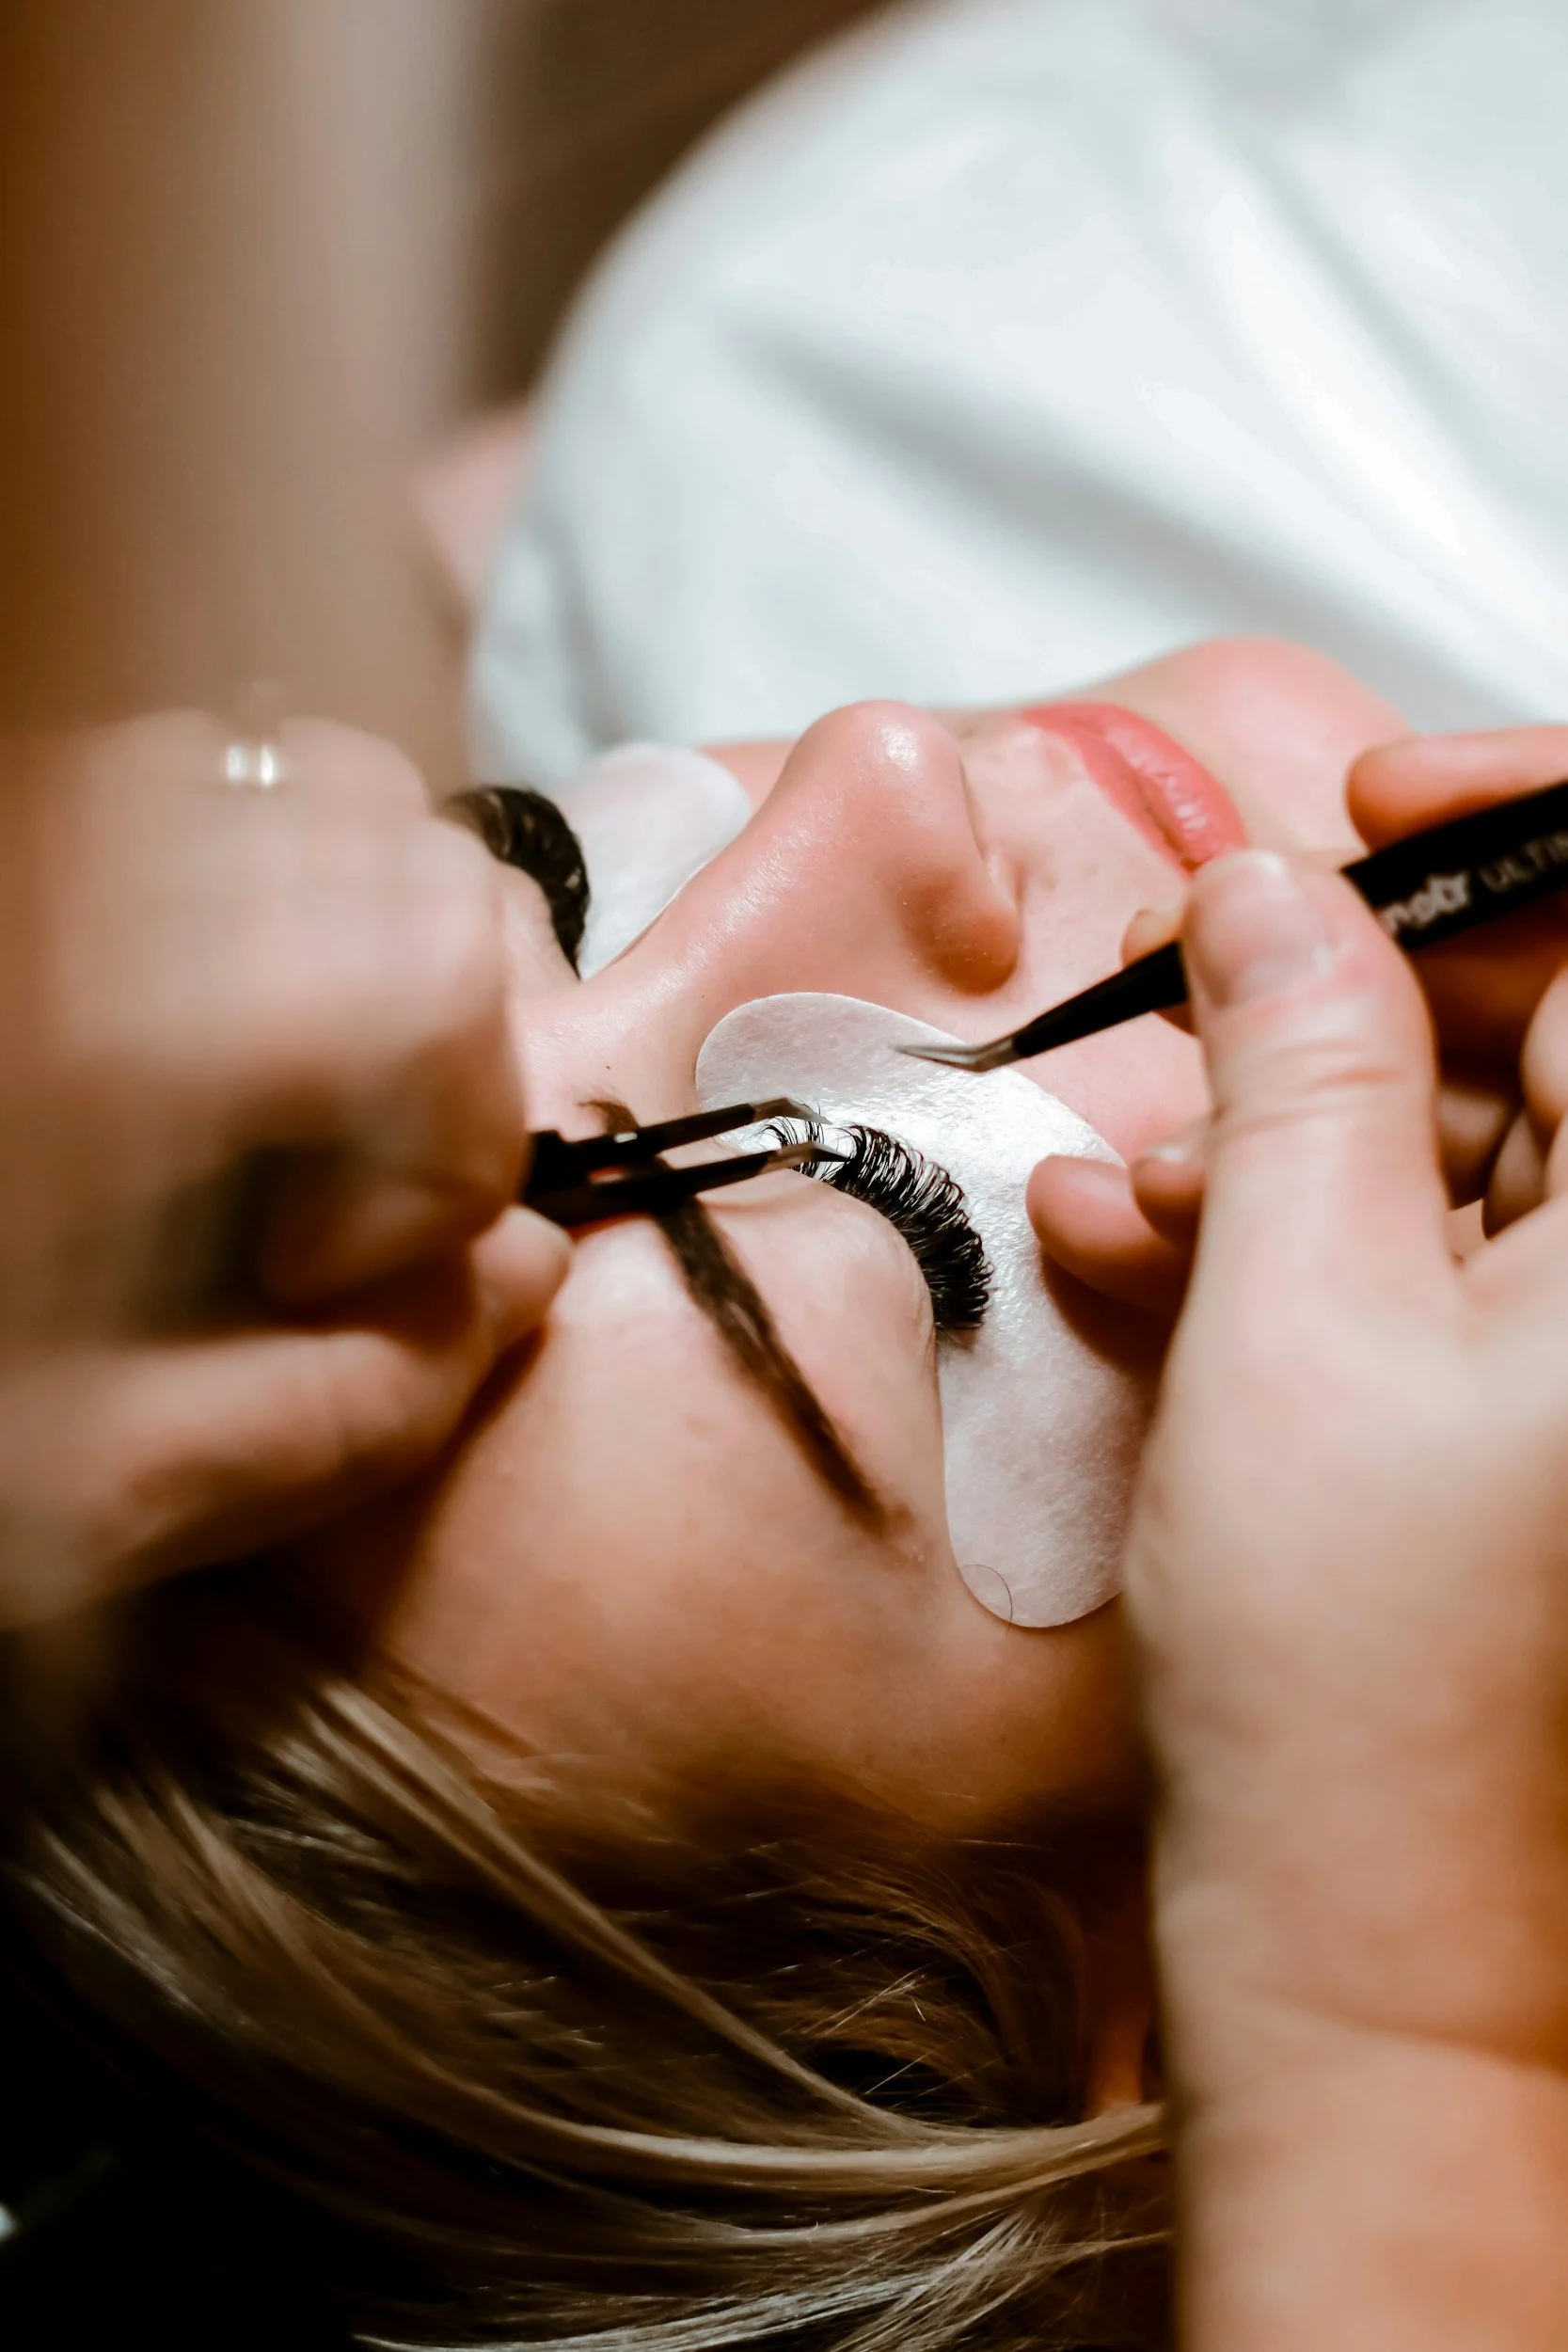
LASH EXTENSIONS
A beautiful way to quickly gain additional volume and length to your own natural lash.
Process: A lash technician sets you up onto a table/bed where they prep the lashes (clean, set onto pad, etc). The lashes are applied one by one to each of your own individual lashes. The glue is very different from the glue used to apply one-day-only false lashes. Lash extension glue is a strong bonded glue that will last for approximately 4 weeks. Your lashes have a natural cycle, so some of the extensions will fall with your own natural lash shedding. Lash Technicians are trained with various styles. Including: Classic Lash Set, Volume Lashes, and Hybrid Lashes (a mix between the two). Inquire with your lash technician about any specific lash extension mascara. Alterntively, I have also used clear mascara on the lashes to bring back the darker tone.
Approximate longevity: 4 weeks / Approximate cost (CAD): $110+
DAY OF FALSIES
Personally my favourite way to enhance your lashes for your wedding day are by using day of false lashes. These are the kind that are applied just for the day, with a surgical adhesive that is temporary (unlike the very strong adhesive used for the extensions). The reason I love these so much, is because depending on the eye makeup we choose for your look, we can then pick out lashes that are best suited for that specific makeup. It is a fully tailored way of getting the most out of the complete look.
Types of Temporary lashes:
Full strip: Comes in many different styles/shapes in a strip that runs along the entire lash line.
Half Lash: A version of the full strip, only cut in half and used on the outer corners of the lash line.
Individuals: These are small clusters of 1-3 pieces that are pin-pointedly applied along the lash line. These are great to create exactly the right lash you are after. You can vary the length and thickness to build up certain areas.
LASH EXTENSIONS VS. DAY OF FALSIES: WHICH DO I CHOSE?
Lash extensions are wonderful if you are wanting something you can have for the days leading up to the wedding, and the days afterwards, but in my experience what I have seen is that there is always the chance it may not be quite enough, and could possibly be not quite right for the day of makeup. I have had many clients have the extensions on and then we apply temporary false lashes on top of the extensions to create a custom lash. This will need proper time and cleaning for removal.
Day of Falsies are great if you don’t want the fuss of going to a lash technician prior to the wedding. It is something that you can have customized to your look. I find these to be a great way to add depth, length and volume to the natural lash, with less comittment or maitenance.
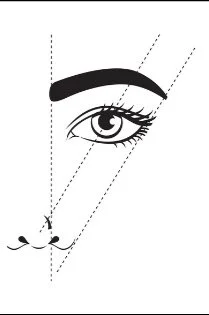
BROW SHAPING
When it comes to your wedding day, for shaping I recommend to have a consultation with a brow technician. They will be able to see your face shape and eye shape and can recommend a brow shape that will complement your entire look.
General Brow shape guide:
BROW ENHANCEMENTS
There are a few brow treatments out there than can really play a huge part in your overall look. Below you will see the top options.
Brow Tinting
This can be done in most salons/spas (approx $40). The technician will apply a dye (much like hair colour) to your brows which in turn darkens the colour. Results last approximately 4 weeks.
You can also do this at home! A men’s facial dye kit is all you need, which you can pick up from most drug stores for less than $15. I have used this technique multiple times on myself, and have confidently recommended it to my clients, with great results! The kit has step by step instructions, however, I would like to add the following: try a shade lighter than you would expect to use (you can always go darker the next time!). Outline your brow with vaseline to create a barrier before applying the dye. Alternative between a clean spoolie and an angle brush to apply product to your brows.
Brow Lamination
This treatment is great for those wanting a very fluffy look to their brows. This is much like a perm in the way that it sets the brows in an up and outward placement. Results last approximately 3-8 weeks. You could get this done a week before the wedding day, but recommended to try it out a few months in advance to make sure you like the look.
Approximate cost (CAD): $80
Micro-blading/Feathering
With this treatment a technician designs a brow shape with you, and uses ink, much like for tattoos, to lightly cut (feather) the skin. The ink bleeds in and you have a micro shading effect for your brow area. This treatment is invasive, results vary depending on artist, and the tattoo does tend to fade, therefore touch ups are necessary. However, this can be a really beautiful way to achieve your brow goals, and I have had many clients where I have to check if their brows are micro-bladed because they look so natural! NOTE: Only go to a very reputable, highly trained artist - and confirm proper hygienic practices!
General timeline for getting this service:
Initial appointment: minimum 6 months before wedding date / Healing time: 10-14 days / First touch up: 30-60 days after initial appointment / Second healing phase: 10-14 days.
Approximate cost (CAD): $500
The Bridal Beauty Prep Guide
Wellness.
WELLNESS TIPS AND TRICKS
Wellness is so important during the wedding planning process, as feeling good on the inside is just as important as feeling good on the outside. There are a few key self care items to consider when planning out your wellness:
Fitness: Fitness is one of my favorite tools for diminishing stress. It is well proven that exercise can significantly improve your mood by releasing those yummy, feel good endorphins. It doesn’t have to be an intense workout plan, but moving your body even a little bit everyday (walking the dog, stretching before bed, etc) can have amazing benefits for our wellbeing. I also use it as my ‘me time’. It creates a space that is just for me and makes me feel taken care of. Gym’s aren’t as easy to be a part of post-pandemic, but there are SO many great apps and online resources for various fitness ideas. Or go grassroots and get outside! Listen to your body and use what is available to you (below I list a few of my favorite fitness resources).
Nutrition: What we put into our body plays a huge role in how we feel. Some items can cause brain fog, fatigue, and agitation. Some cause clarity (mind and skin!), higher energy levels, and better digestion. Food reactions, be it good or bad, are sometimes different for each person, so keeping track of the way you are eating, or visiting a nutritionist may be a good idea. It can help you determine what specific foods help your system, and what foods don’t. I also love making meals a form of mindfulness. I once did a mindfullness course, and one of the exercises they had us do was to hold a raisin. We were instructed to feel the texture, close our eyes and smell the fruit, listen to it (so kooky but was super interesting lol), and then finally put the raisin in our mouth. They had us keep it in our mouth and feel it with our tongue, notice if we were salivating, and then finally taste and chew. It totally opened up my eyes to a different way to experience our meals (very different than my usual, let’s scarf this down while I watch reality tv on my laptop kind of moments haha). Now it has become natural for me to embrace the present moment while cooking and enjoying a meal. The phone is down, the electronics are off, and my mind feels calm and quiet. It doesnt always last that long, but even the shortest amount of time it brings a sense of peace.
Mental wellbeing: Some acts can help you sort through your different feels during the wedding process, and giving a little extra TLC to our mental health during this time can be so rewarding. Try things such as journalling and making a ‘happy list’ (things you can turn to whenever you need a pickmeup, or a time-out). It is also helpful to literally schedule in your form of ‘you time’ in your calendar. And taking the time for quick 5 minute meditations (espeically first thing in the morning, and last thing at night) can completely recenter you. All in all, it basically comes down to: what makes you feel good? Whatever the answer, do that :)
RECOMMENDED APPS TO HELP WITH WELLNESS
Insight timer: a great meditation app that has guided meditations as well as white noise.
Gaia: a resource for mindfulness and yoga practices.
Clue: a period tracking app that helps you track your mind and body fluctuations with your cycle.
Headspace: A place to check in with your levels and tools to reduce stress. Also includes tools for sleep.
Calm: An app for meditation and ‘sleep stories’.
Myfitnesspal: A tool you can use to track your food, so you can find out which ones may be causing irritation/sensitivities.
Fit Foodie Finds: One of the best websites (imo) for gorgeous, healthy, and delicious recipes. Their instagram account @fitfoodfinds is fun to follow along with as well, and a good way to get quick inspiration.
Alive By Whitney: Created by the fitness influencer Whitney Simmons, this app is a follow along exersice and wellness program. I thought it was really unique that she also includes a journalling section in this (she is a strong believer in taking that time for yourself to acknowledge gratitude as well as your thoughts/emotions). I haven’t used this personally, but I’ve been tempted (I’m already subscribed to a different app - see below) however, Alive by Whitney has amazing reviews and I really love what she stands for, which is a whole lotta self love.
Peloton app: You don’t need to have a peleton bike to reap the benefits of their amazing app. I bought a much less expensive indoor bike and use the cycling classes from peleton for my rides (its uh-mazing). But on top of that, I use it almost every time I go outside for a run (they challenge you with your speed and is basically like having a hype woman (or hype man) in your ear coaching you along the way. I always notice I push myself a little bit more, and stay on track while using this. It also has: Yoga, Stretching, Meditations, Walking, Strength, Cardio, Outdoor (audio only), Running (indoor treadmill classes), and Bootcamp. Seriously though, $12.99 a month for all of that blows my mind.
Yoga with Adrienne is my go to youtube channel for all things yoga. She has such a cute personality and makes yoga easy and accessible.
You can also check out youtube for other quick videos such as chakra cleansing, or mindfulness.
Here are a couple links to guided meditations that may be useful at any point:
For when things get way to overwhelming and you need a giggle: F*ck That: An Honest Meditation
Body scan for grounding: 15 minute Guided Meditation: Body Scan
Daily calm: 10 Minute Mindfulness Meditation: Self Soothing
The Bridal Beauty Prep Guide
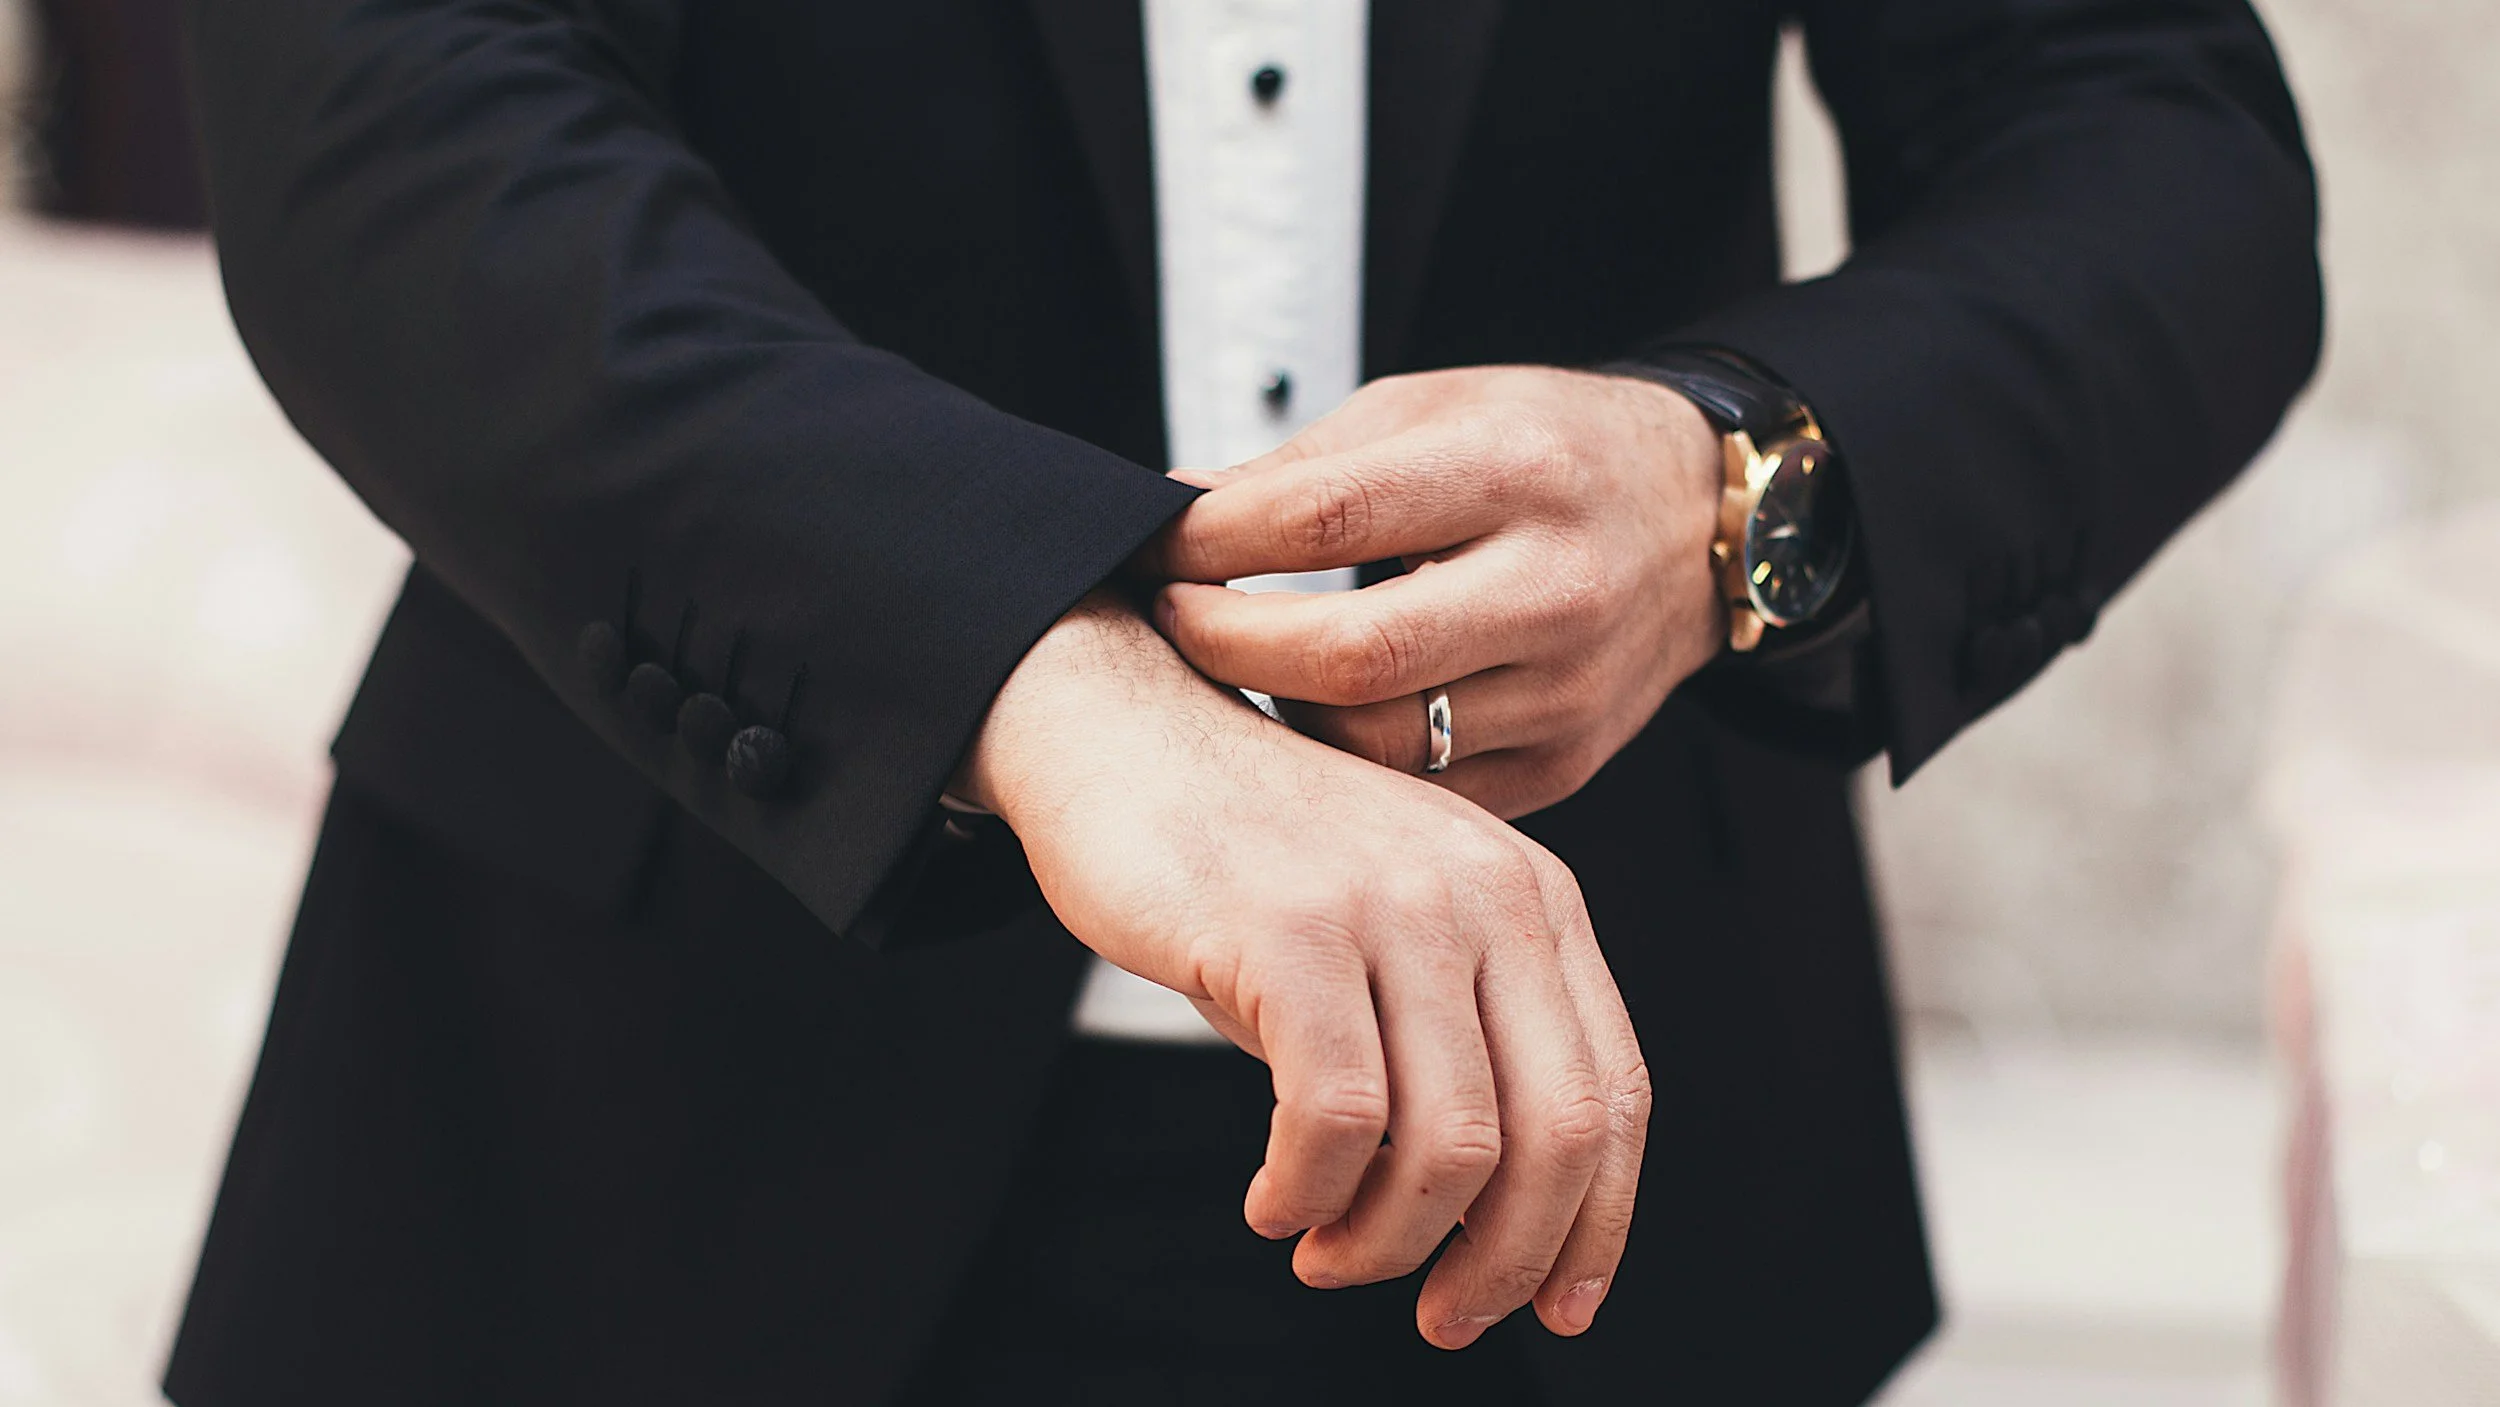
For The Groom.
It is becoming more and more of a trend for grooms to get touch ups on the day of the wedding. But there are also a few small things he can do leading up to the wedding that can make a big impact for the way he looks and feels.
Skin Care: Create a simple skin care routine. It can be as easy as incorporating a nice cleanser and moisturizer. Maybe even a toner if you want to get fancy. Start this regime about 6 months before the wedding, and be consistent so your skin gets into the groove.
Barbering: Think about who and where you would like to have your hair cut before the wedding day. Try it out a few times beforehand, and then have your last cut about 5 - 7 days before the wedding. Discuss shaving and beard trimming for your style and face shape with your barber.
Nails: The grooms nails are going to be on display almost as much as the bride, so taking a few simple steps to keep them clean is essential. File, buff, and moisturize is all you need.
Brows: Keep those brows in check by looking them over and trimming any strays that may be too long, or growing on a different angle. Same goes for nose and ear hairs (you can get a simple trimmer here)
DAY OF TIPS
My recommended steps for the day of are:
1) Cleanse and moisturize the skin, include an SPF
2) Comb brow hairs with a spooly brush and use brow gel to keep in place
3) Spot conceal any redness or blemishes with a hydrating concealer or tinted moisturizer. This should be buffed/feathered on lightly to appear as natural as possible
4) Use a translucent powder to set
5) Brush on a very light, matte, bronzer to cheeks and around hairline if you need to bring back a bit of colour
5) Have a matte texture gel handy to help with any additional shine (such as around the forehead/hairline, nose, etc).
6) Use a chapstick
7) Moisturize the hands
8) Use your favourite hair product to style hair as desired (TIP: Sometimes hairspray on a comb works really well to create shape without weighing the hair down)
The Bridal Beauty Prep Guide
Don’t Forgets.
THINGS TO DO THE NIGHT BEFORE THE WEDDING
So you’ve gone through the family arriving, the rehearsal, the dinner, and now you are back at your accommodation trying to wind down for the night before the wedding. This time can be very hectic and there is probably a million things running through your mind, which can seriously alter you bridal zen; affecting your sleep, skin, and general well being. I’ve experienced a lot of mornings where the bride either had a great night before, or a not so great, and I’ve compiled a list of some of the top things that contributed to a blissful rest before the big day. Accompanied with items that help prepare for your getting ready session.
Have a check in with your hunny. Tomorrow you are going to marry your special person! Wedding days can get busy and one of the best ways I’ve seen to prepare for that is to connect and have a moment with your loved one beforehand. Remember why you are here :)
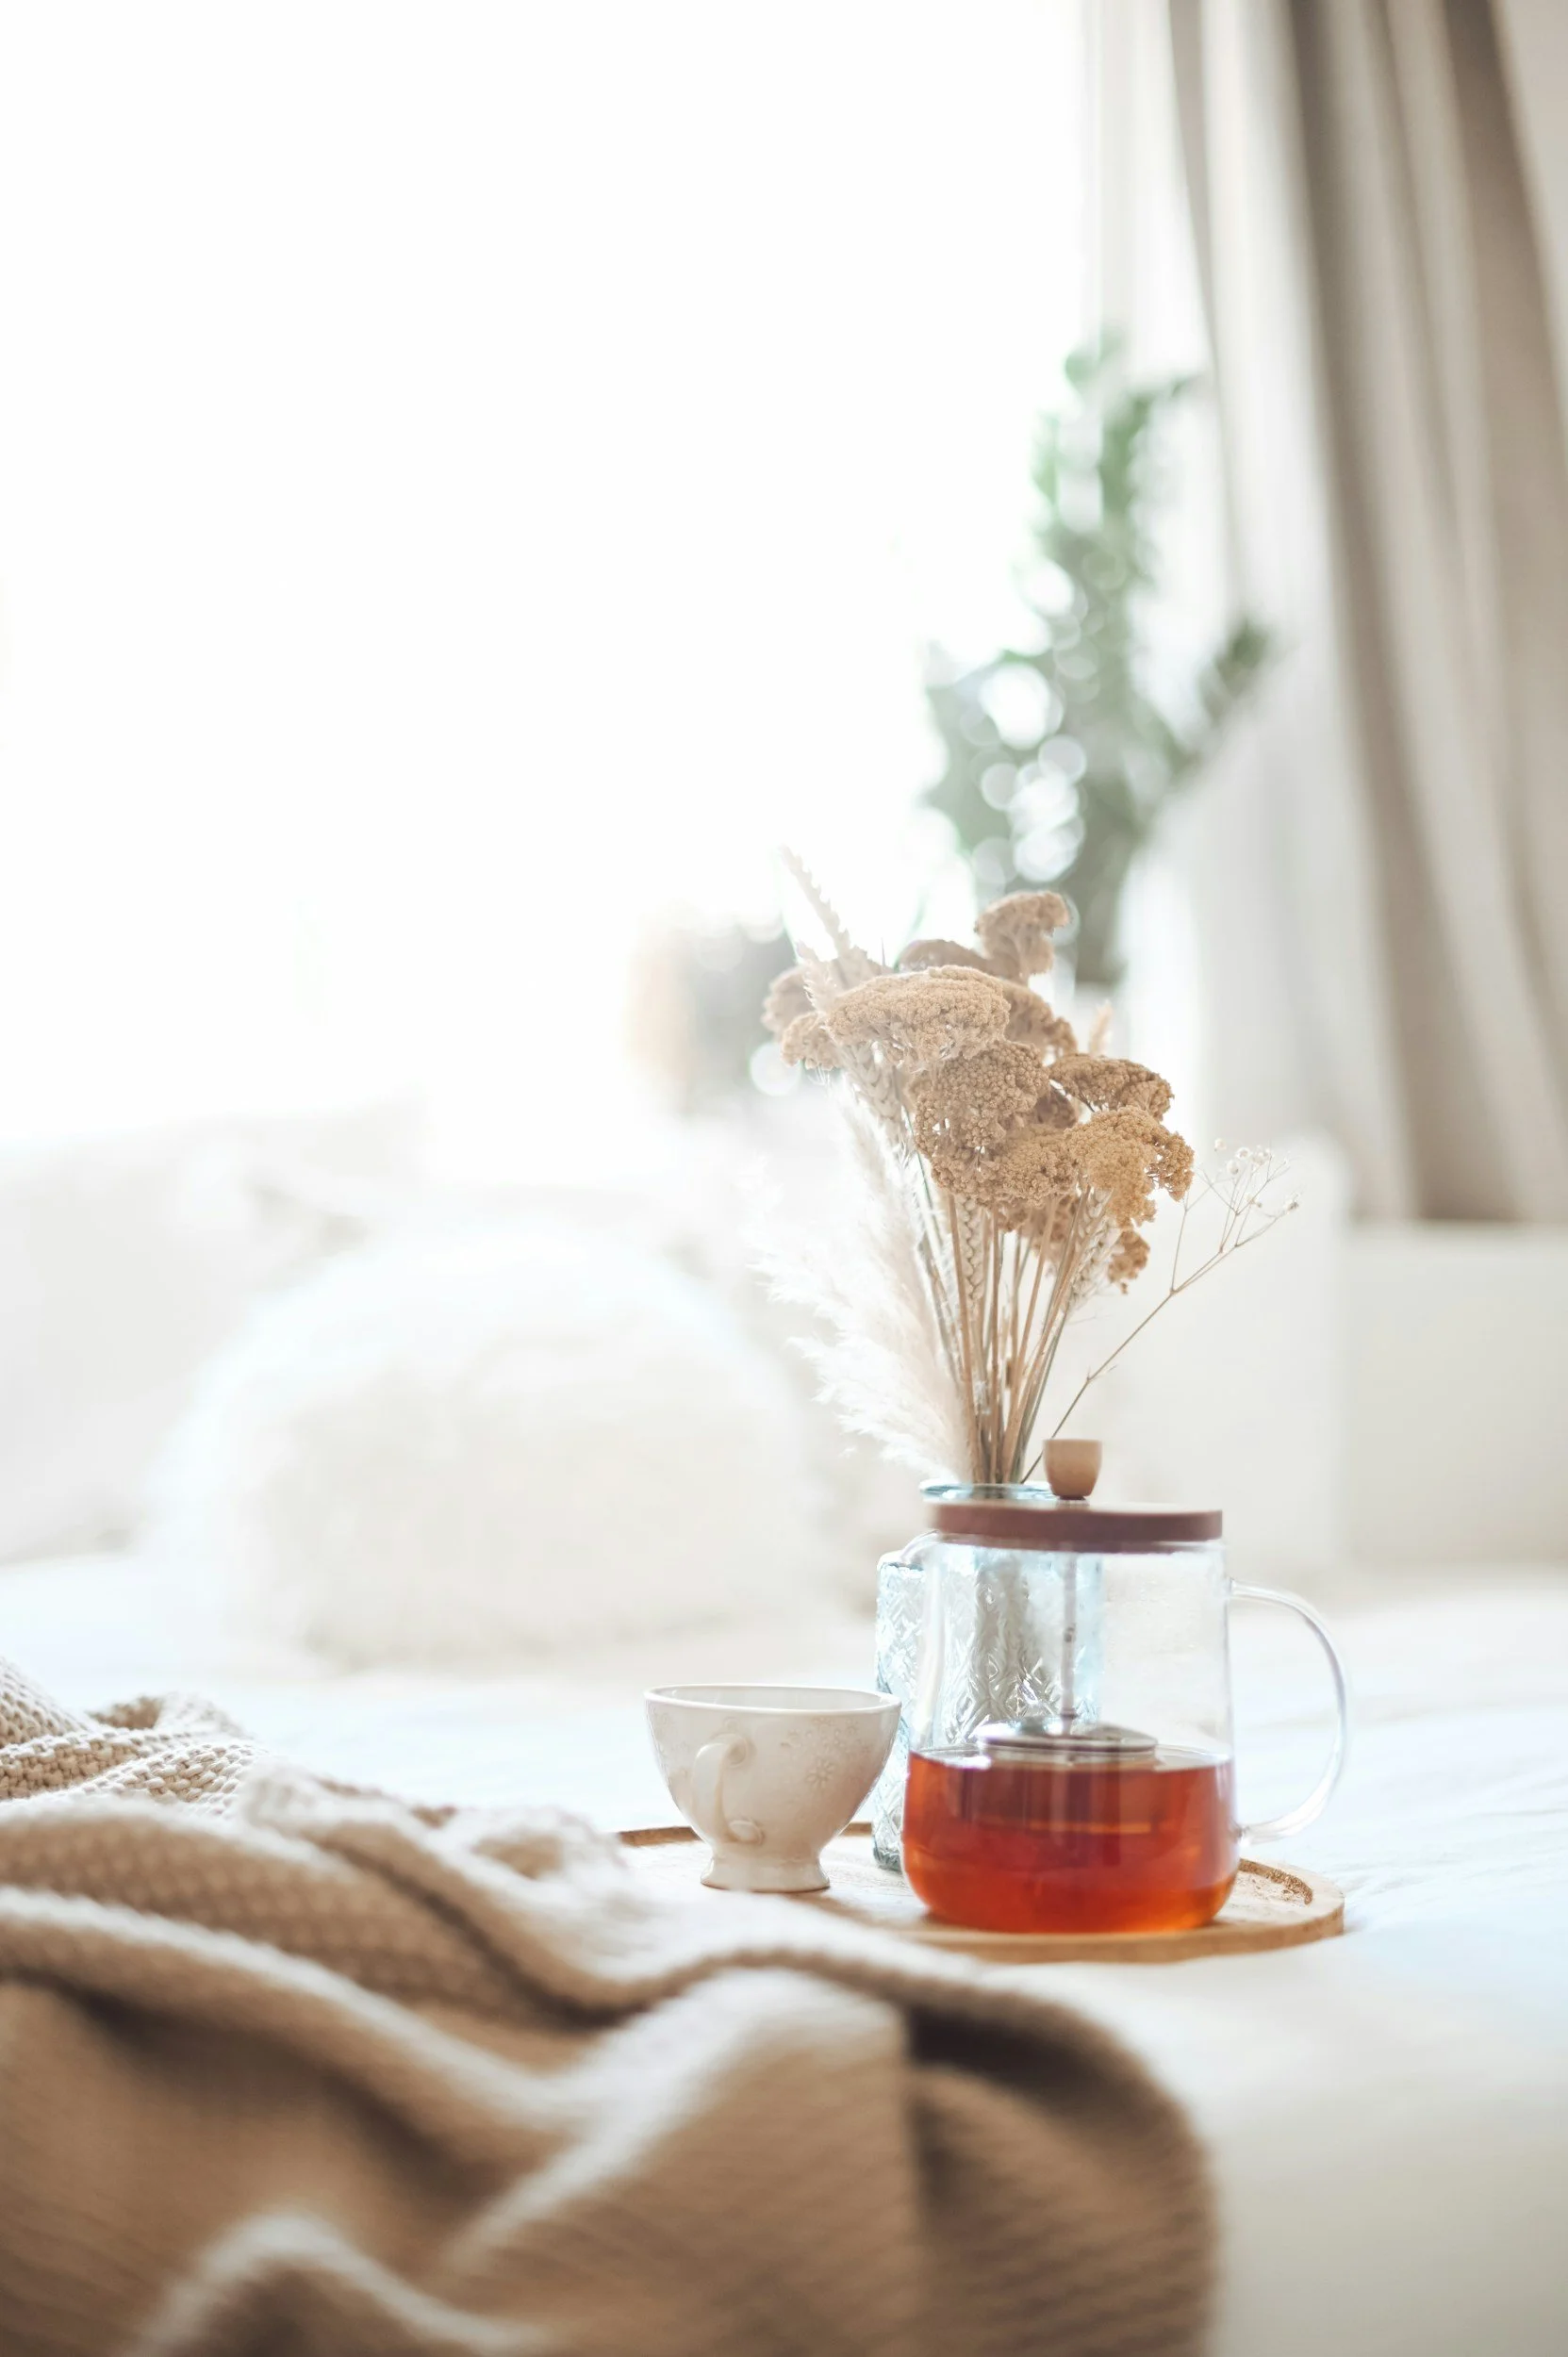
Drink some calm tea. My go-to for settling my mind and getting into a good sleep zone.
Take a bath, go for a run, or do anything that exudes the extra energy.
Hydrate, hydrate, hydrate! drink up that water to flush the system.
Last minute beauty prep includes: making sure your hair is clean and dry for your appointment tomorrow.
If you need to de-puff your eyes, try the “cool spoon” trick of leaving two spoons in the fridge and rubbing them gently over your eyes and surrounding area. Alternatively, use a jade roller or Gua Sha stone.
Set a non-agitating tone for your alarm clock, something that soothes you awake.
CREATING THE BEST SPACE FOR THE MORNING OF
How to set up/choose the getting ready area (these are things your artist will be thinking of on the day anyway, but just to be aware):
Natural light is key. If you have a space that is in front of a window that will be the best spot for your artist. You can also ask your artist if they have a mobile light that they bring with them (it will replicate natural light, as opposed to warmer lights used in common household lamps).
Low chair for hairstyling. Low chairs are best for the hairstyling portion as it allows for the artist to move around you and reach the top of your head for curls and pinning.
High chair for makeup. Most artists will come equipped with a chair they love to use (as we know how important it is for our backs!!). However, if you have a high chair (think bar stool, etc) handy at the accomodation, you can always have it there as a backup.
Table space. This is essential. Your artist will need some surface space to lay out their products. Kitchen table height is amazing, as coffee tables tend to be quite low and will quickly tire the artist. Some artists can accommodate bringing a travel table.
Plug ins. Something most artists will have in their kit is an extension chord to plug in their tools, however, knowing where the plug ins are in the space is very helpful when setting up!
Keep in mind if you want to have the getting ready zone out in the open and close to others in the space, or if you want it to be slightly to the side where people can have more of a quieter space.
A few extra tips for a smooth wedding morning….
Share the schedule with the others that are on it. Having everyone know their start time will immensely help the schedule. Have everyone do the things they need to beforehand like wash their face, and have their hair completely dry will help keep things on track.
Know that your completion time outlined on the schedule is when you are completed in the hair and makeup chair, not complete to walk out the door. Below are some of the things to account for after your appointment:
Photos with you and the gals in your robes and/or any portraits
Having a toast
Getting into the dress
Putting on the veil
Putting on shoes and accessories
I recommend allowing a minimum of 30-40 minutes in between getting out of the makeup chair and then leaving the accommodation.
MUSIC
DAY OF PLAYLIST SUGGESTIONS (Spotify):
I have curated a selection of various playlists that you can use on your wedding day! These are some of the tunes I find to work really well for getting ready :) From easing into the morning, to classic singalongs, to getting pumped. See them here.
EMERGENCY KIT CHECKLIST
An emergency kit checklist is huge to make your day super smooth. Having things on hand for things that pop up will make your life a whole lot easier. I’ve put together an entire list for you to download which can be found in the welcome packet, or at the at the top of the page in the table of contents area. There you can also find your timeline cheatsheet, product favourites, and rehearsal dinner tutorial.
THANK YOU
THANK YOU

Congratulations! You’ve made your way through the ‘how to beauty prep’ roadmap for your wedding day! Please feel free to reach out if you have any questions.
PS - Don’t forget to follow along on Instagram @colleenconroymakeup 💖
xoxo
Colleen
Get in touch.
Have an idea or feedback regarding the bridal beauty prep guide? Feel free to drop me a message here! 💞